How to Whitelist Emails
What is Whitelisting?
Whitelisting is essentially the process of indicating to your email service provider that certain email addresses or domains are trustworthy and should bypass spam filters. By whitelisting, you're essentially telling Gmail, "Hey, emails from this sender are important to me, so please make sure they reach my inbox. I created a short video to break this down, or you can scroll down and use the blog.
Step 1: Accessing Gmail Settings
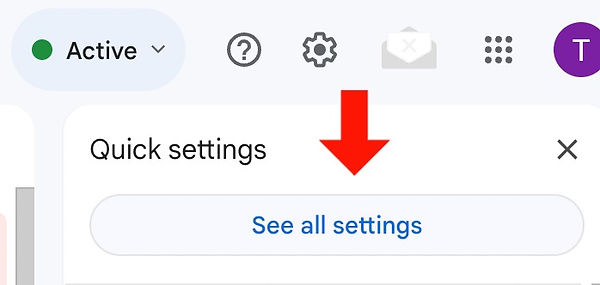
Once logged in, locate and click on the gear icon in the upper right corner of the Gmail interface. This will open a dropdown menu. From the menu, select "See all settings" to access the full range of Gmail settings.


Step 2: Navigating to Filters and Blocked Addresses
In the Settings menu, navigate to the "Filters and Blocked Addresses" tab.

Step 3: Creating a New Filter
Once you're in the "Filters and Blocked Addresses" tab, scroll down until you find the section labeled "Create a new filter." Click on the "Create a new filter" option to proceed.

Step 4: Specifying Whitelisting Criteria
In the dialog box that appears, you'll see various fields where you can specify criteria for the filter. In the "From" field, enter our email address: Booking@swiftweddings.com in the "From" field. Next Click Create filter.

Step 5: Confirming Whitelisting Action
A new dialog box will appear ,Check the box next to "Never send it to Spam" and "Always mark it as important" to ensure that our emails always land in your inbox. Click the creat filter button and you're all done!

